How to Refinish a Vintage Shelf with Chalk Paint
From drab to FAB! Give an old shelf "new" life with a fun Chalk Paint Makeover. Learn how to layer chalk paint in this affordable DIY furniture project.
Ingredients
- A wooden shelf
- Sandpaper
- Cleaning cloths
- Chalk paint in TWO colors
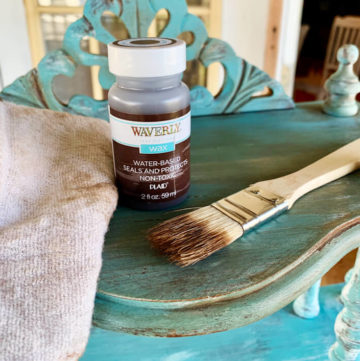
- Antiquing wax
- Paint brushes
- Drop cloth
- Soap and water
Instructions
- Clean the piece of furniture you are working with thoroughly. If not very dirty, use a warm water and mild soap solution. If very dirty, use TSP.
- “To Sand or Not To Sand”… This is totally up to you. Chalk paint does not require sanding. I decided to sand the shelf lightly for one reason. The look. Because the surface was so smooth, I used sanding to create more texture and character.
- Remove any sanding dust.
- Using a dry brush technique (how-to in the post), lightly brush the base coat (WHITE) on the top and bottom of all shelf surfaces. Do the same for the shelf posts and any special embellishments.
- Let the paint dry. Chalk paint dries VERY quickly, especially when you are working with light layers. Refer to the package directions for more info. (I waited about 30 minutes.)
- Either clean the brush (or grab a different one), and repeat this process using your top paint color (BLUE). You can paint lightly or heavily depending on the final look you want to achieve. For this vintage look, I recommend using a lighter coat in some areas, a heavier hand in others.
- Let the second coat dry a little longer than the first because up next is the dark wax.
- To create even more texture and an “aged” look, use sandpaper to sand down some edges, remove excess paint, etc. I like to sand the edges, the front curves of the shelves, and certain areas of the shelf posts.
- Wipe down the shelf to remove all sanding dust.
- Using a clean brush or a soft rag, lightly apply the antiquing wax to the shelf. Work in SMALL sections, immediately wiping the excess wax away. Work the dark wax into the grooves and crevices and edges of the shelf to create dimension.
- Let the piece dry completely (24 – 48 hours) before using.
Tried this recipe?Let us know how it was!